Evaluation
1. In what ways does your media use, develop and challenge forms and conventions of real media products?
My video is essentially an alternative slant on the Indie and Rock videos produced by the music channels and companies Q and NME. The artistic and creative side of these videos appealed to me because I like to things differently as well and particularly like White Stripes video Hardest Button to Button where every shot is cut to the music emphasising the rhythms and being an integral part of the music. The random approach of comedy television shows such as Monty Python’s ‘Flying Circus and The Mighty Boosh appeals to my sense of design and style of continuity. Green screen technology was particularly suitable for this genre.


The inspiration for the overall impact of the video was drawn from the Pop Art of the 1950’s and 60’s using the block colours and simplified images as used by Roy Lichtenstein and Andy Warhol. This challenges the narrative and showcase styles of existing music videos by emphasising the rhythms and the solo performers and letting the music speak for itself rather than overlaying it with an unnecessary and, as in the case of many pop videos, irrelevant narrative which in my view can detract from the impact of the music itself.
here are some examples of music videos that have influenced the making of mine and led me to which audience i want to target being Indie/Rock/Alternative.
here are some examples of music videos that have influenced the making of mine and led me to which audience i want to target being Indie/Rock/Alternative.

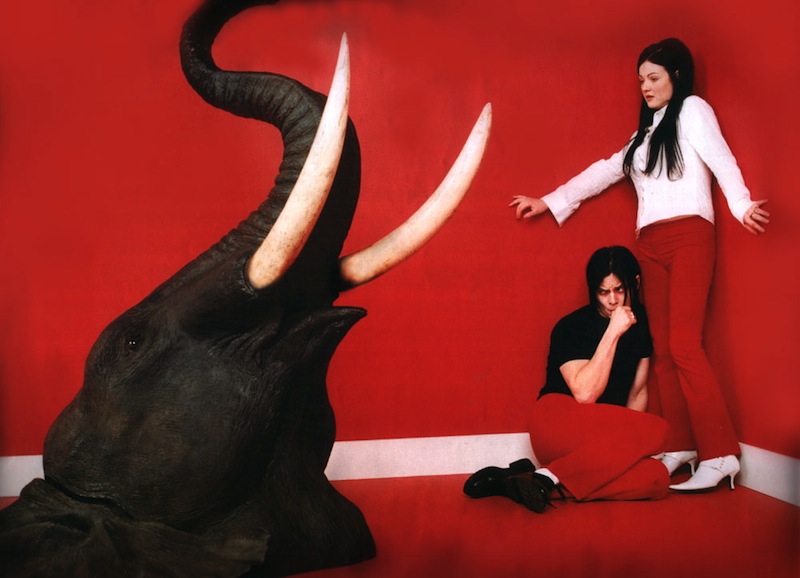 The spectacle style which is often used in many Indie bands such as Foals, Vampire Weekend, White Stripes and Ok Go influenced the creative side of my music video insofar as these bands produce original and abnormal ideas that break away from the typical conventions and clichés music videos consisting of dancing and exaggerated lip synching. I tried to use a variety of angles of shot which needed to be limited by the size of the Green Screen. Because the emphasis of the video was on the performers and the rhythm of the music, close up shots of guitar playing and the singer, emphasising the lip movements. Zoom shots were used for dramatic effect and to keep up the stamina of the music by emphasising the pace and energy. The lighting for the Green screen sharpened the image and exposed the details. The fast rhythmic cuts showed the influence of the Indie rock videos and emphasised the groove and vibe of this genre.. The mise-en-scene consisted purely of the solo guitarist the drummer and the singer spotlighting each one in turn at relevant moments in the music. This video steered away from a conventional narrative style but in doing so emphasised the personality and style of each performer, particularly the lead singer.
2.How effective is the combination of your main product and ancillary texts?
My ancillary text consisted of a digipack, an album cover and booklet and a poster. It was important that the video and its packaging had a homogenous style and the same approach and influences that determined the style and presentation of the video are also seen in the album cover and the poster.
When researching my ancillary texts, I looked at White Stripes, the original artists for the song selected, together with other artists such Foo Fighters and was drawn to their use of bright colours. I particularly liked the neon colours which create strong contrast against a grey background. The same neon colours were used for the Green screen in the music video and the images in the video were in black just as seen on the album cover and the poster. The only exception to this was the album cover in which in the foreground has white text on black but still uses artistic and retro elements. These feature a close up of the body of a guitar visually blurred and distorted as the background to emphasise the Rock genre. My taste in music has always been heavily based on Rock and Alternative and it was easier to decide what to choose as my subject for this project. I listened to a wide range of Rock and Indie music and thought that Astro by White Stripes was the best suited to combine the elements of Rock and Alternative.
It was important that the album cover and booklet looked like the genuine article and so it has all the usual features found on album covers such as the play list, bar code, conventional warnings regarding copy right. To give additional authenticity and credibility to my poster, I added advertisements for famous music shops and distributors such as HMV and website links. The most important feature however was to highlight the name of the band Gazebo
In the booklet , the presentation of fake studio pictures - tie up with the invented technical team, whilst the acknowledgements include the performers and songwriter. It is important to cultivate your consumers and your target audience by making them familiar with the members of the band so that your listeners/viewers make a connection between their names and the visual image. This is how I guess you start a fan base for the band. To give the product a more complete look, I had fun making up the rest of the play list titles with great intriguing sounding song names


3. What have you learned from your audience feedback?
I have learnt that the features that I had hoped would intrigue and attract the viewer were in fact the points that were picked out by the other students. It was interesting that each interviewee found something different that appealed to them. This ranged from performance features such as the lip synching, the shot of the drums, the ‘crazy’ facial expressions, the point of view shot down the neck of the guitar and the emphasis on the megaphone, to the technical details. Some were drawn by the choice of colour and the rhythmic vibe; others noticed the quadruplet split screen scene whilst others identified the ‘alternative’ approach with bright colours and flashing shots . They had anticipated that my video would have plenty of effects and fast cuts.
Their reaction to the video was very positive and whilst they considered it to be of a professional standard, they were all aware that this was not a mainstream music video.
Whilst the choice of music was not everyone’s favourite genre, all said that they liked it once they had listened to it with the images. For one person, however, it was just up their street – a fellow McGillian with an impeccable taste in music!

4. How did you use media technologies in the construction and research, planning and evaluation stages?
I used the internet to research the choice of songs, the retro style the music suggested, the design of the album cover and the video itself. This gave me visual and audio examples of the retro style and the pop art movement of the 1960’s 70’s that inspired this. I was particularly attracted by the style of Andy Warhol’s art pieces and the clear contrasting colours of Roy Lichtenstein. Youtube helped me find songs and research other music videos.


The filming of the video took some time and I used a camera and a tripod with strong lighting against a green screen. This was an advance from my AS video which depended entirely on a camera and spot lighting. The lighting needed to be more intense in order to make the Green screen as bright as possible.
To create the black monochrome figures of Roy Lichtenstein and Andy Warhol against the bright neon coloured background used by these artists, I experimented with the use of the Green Screen and black and white film. To create the effect similar to a kaleidoscope using split screen, I experimented with using ‘Final cut pros’ system of being able to move the frame. I made four copies of the frame and then put all four frames into one frame and flipped and rotated each frame to form the symmetrical pattern in quadruplets. To get the lip synching in time with the sound track, I listened to where the sound track gave a long held mouth sound such as Oh or Ah and moved my video track in line with that point. Precision was crucial to create the sharp, strong rhythms.
The technologies used for the digipack and the poster were inspired by researching the products of Rock bands. The covers for albums by artists such as Foo Fighters and My Bloody Valentine strongly influenced my own cover which featured the guitar body with colours and effects added. The choice of song set the style for the video and the ancillary texts.
 The editing of the video was key to the effective replication of my vision for the video. Precision was essential in order for the video to be as good as I imagined it to be. In my head I exaggerated the quality of the product bearing in mind what assets I had. These were the Chroma key software, the sepia tool, the brightness and contrast in addition to my cast of actors and props. The Chroma key software was used to create the coloured background and its large colour range enabled me to use the colours that I had visualised. The sepia meant that I could put the foreground i.e. the props and the performers in black and white and the brightness and contrast gave the foreground the desired tone. The four frames for the kaleidoscope were mirrored or flipped to create a symmetrical effect and then placed with the mouse over the images. The 4/4 rhythm of approximately 120 bpm set the rhythm for the change of frames on each crotchet of the bar. This was done whilst playing the video and soundtrack.
For video I used Final Cut Pro and for the digipack I used Adobe photo shop and Adobe InDesign. The photo shop was used mostly for effects such as the visual distortion of the background picture of a guitar on the album cover and of the poster to give an alternative effect. The Adobe InDesign software was used for the production of the album booklet and I chose different fonts and positions for the text and colour scheme. I felt that the technologies used had helped me produce the exact music video I had envisaged and I felt pleased that it was approaching a professional standard. The final product was saved on a dvd but I decided not to post this on Youtube until after it has been marked.
New technologies I discovered from making this music video were how to use the ‘Green Screen’ and the ‘Chroma Key Tool ‘. Both were very useful and easy to use. Creating set colour frames to use over video footage filmed against the ‘Green Screen’ was very flexible, simple and effective. It allowed me to create patterns of colour in my colour frames by using a picture of a colour on a jpeg file and using this as the background and changing the colours using a sepia tool. The Chroma Key Tool was used to get rid of the green coloured background ready to replace the green with my colour frames.
Making this music video added another dimension to my love of music. It gave an opportunity for invention and fun against a rhythmic background. I managed to interpret what I felt in the music in a visual form.
Producing something myself meant that I could control the whole process and had the satisfaction of making a final product in which I was able to make without compromising my original vision. That is not to say that working with others can’t be fun! The collaboration was excellent and I learnt how much others can support you in your venture. The performance took on a life of its own once the camera started rolling and Ade’s lip synching created a new pop star!
 Advance planning makes things run smoother. I think that the preliminary Green Screen task helped me create what I had envisioned and know just what I had to consider before embarking on the music video. I was able to get started straight away. This preliminary task gave me the confidence to know that I could create what I saw in my head. I did not want to overcomplicate the filming and editing but also I knew I had to be quite clear what effect I wanted to achieve.
By creating a weekly blog of the making of this video, I was able to take stock of where the project had reached and keep track of what I had learnt. I also became more aware of the different sources and influences in my work.


